3D Printer Troubleshooting

Written By
marketing
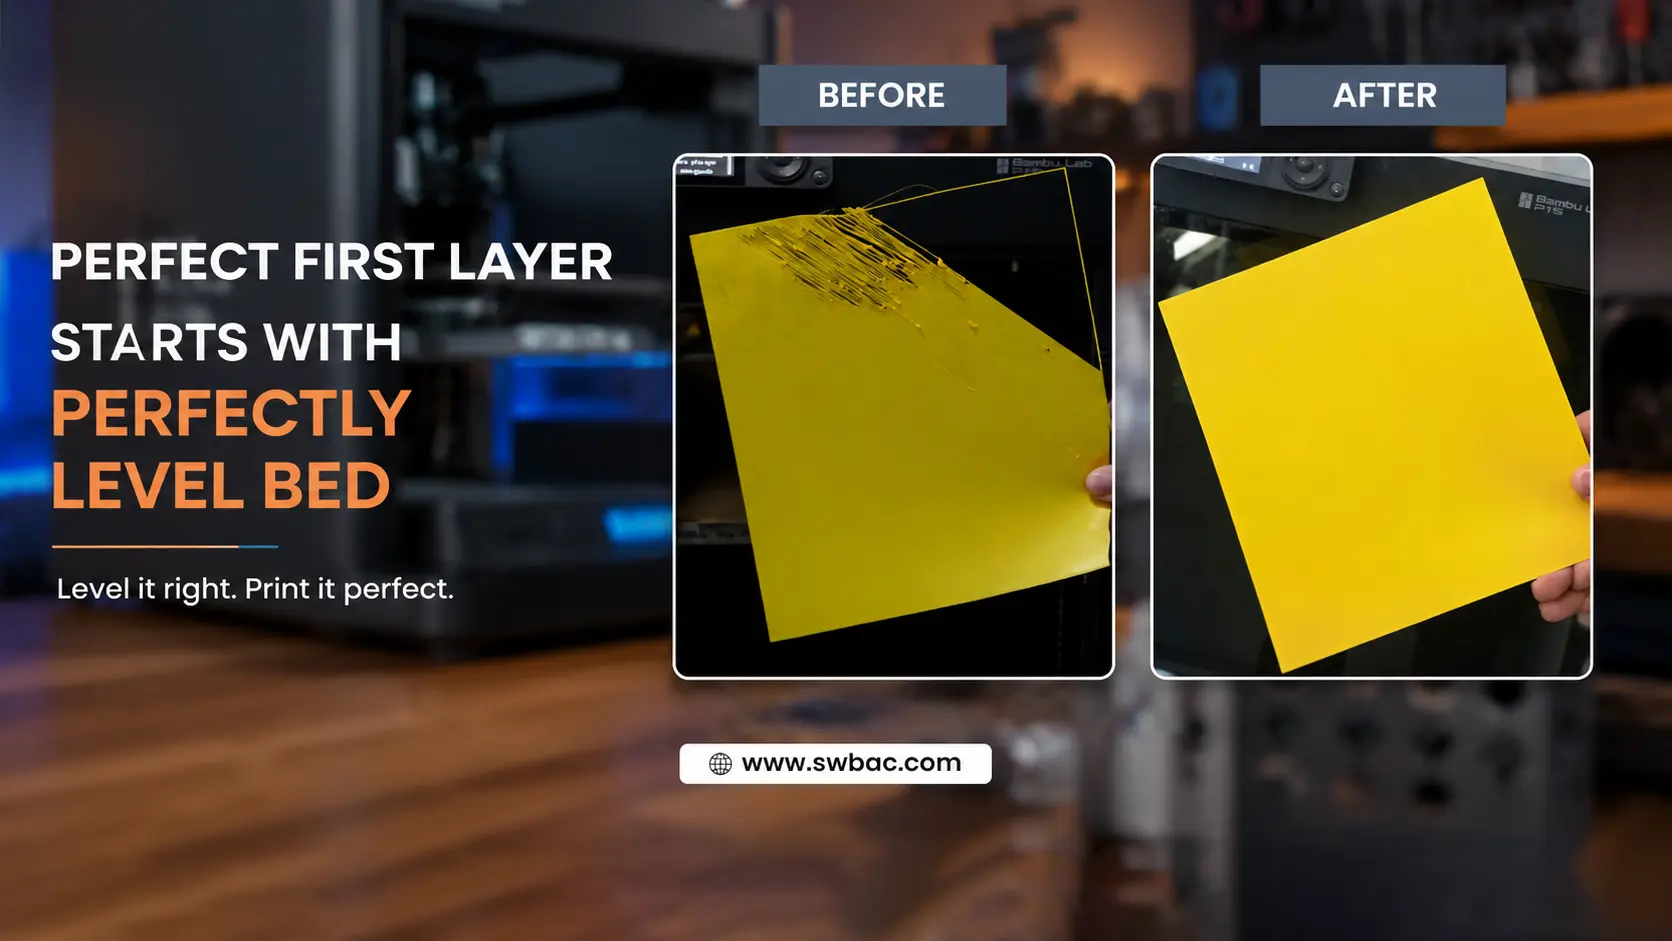
How to Manually Level Your Bambu Lab Bed (Step-by-Step Guide)
A practical guide to manual bed leveling (tramming) for Bambu Lab P-Series printers — fix first layer issues and get perfect adhesion every time.
Published by SWBAC, Kuwait’s leading 3D printing store.
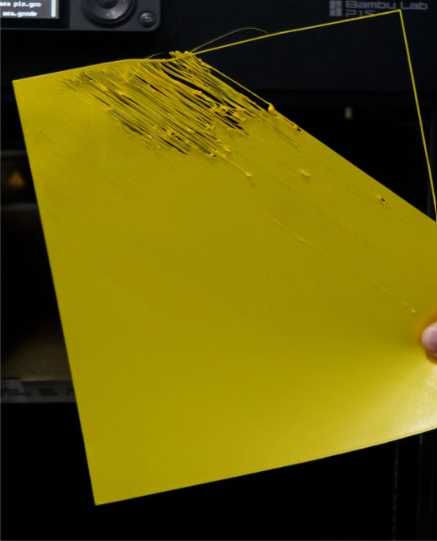
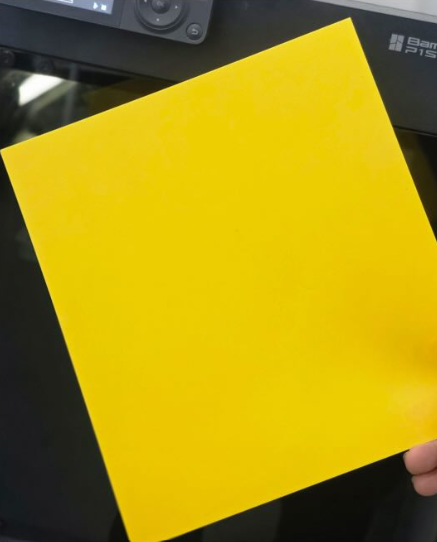
Getting a perfect first layer is the foundation of every successful 3D print. If your first layer isn’t sticking evenly across the bed, or you notice uneven gaps or squishing like the photo below, your Bambu Lab printer likely needs manual bed leveling — also known as “tramming.”
This step-by-step guide walks you through the complete process so you can dial in your bed and get back to printing with confidence.
Prefer to watch instead? Check out our video guide here.
Before You Start: What You’ll Need
Before beginning the bed leveling process, make sure the following steps are completed:
Clean Nozzle
Heat up the nozzle and wipe off any leftover filament before starting. A dirty nozzle can give you false readings during leveling.
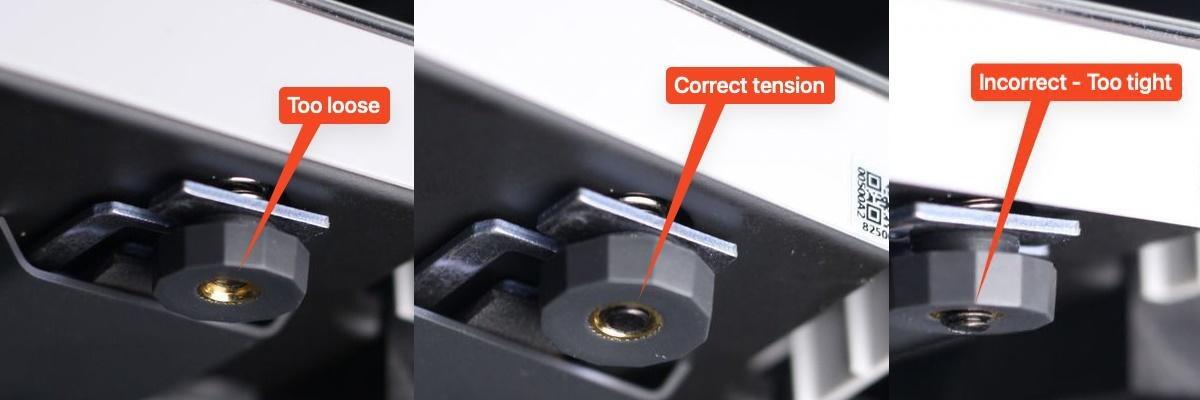
Baseline Knob Tension
Check the three bed leveling knobs underneath the printer and set them to the same baseline tension before you begin (see the reference photo below).
Step-by-Step Bed Leveling Instructions
1. Download the Bed Leveling File
Download the bed leveling file from Bambu Lab (download here) and copy it onto a microSD card.
2. Start the Leveling File
Insert the microSD card into the printer and start printing that file.
3. Printer Movement Sequence
The printer will home, then move to the front-left knob and pause for about 30 seconds, then the back knob, then the front-right knob.
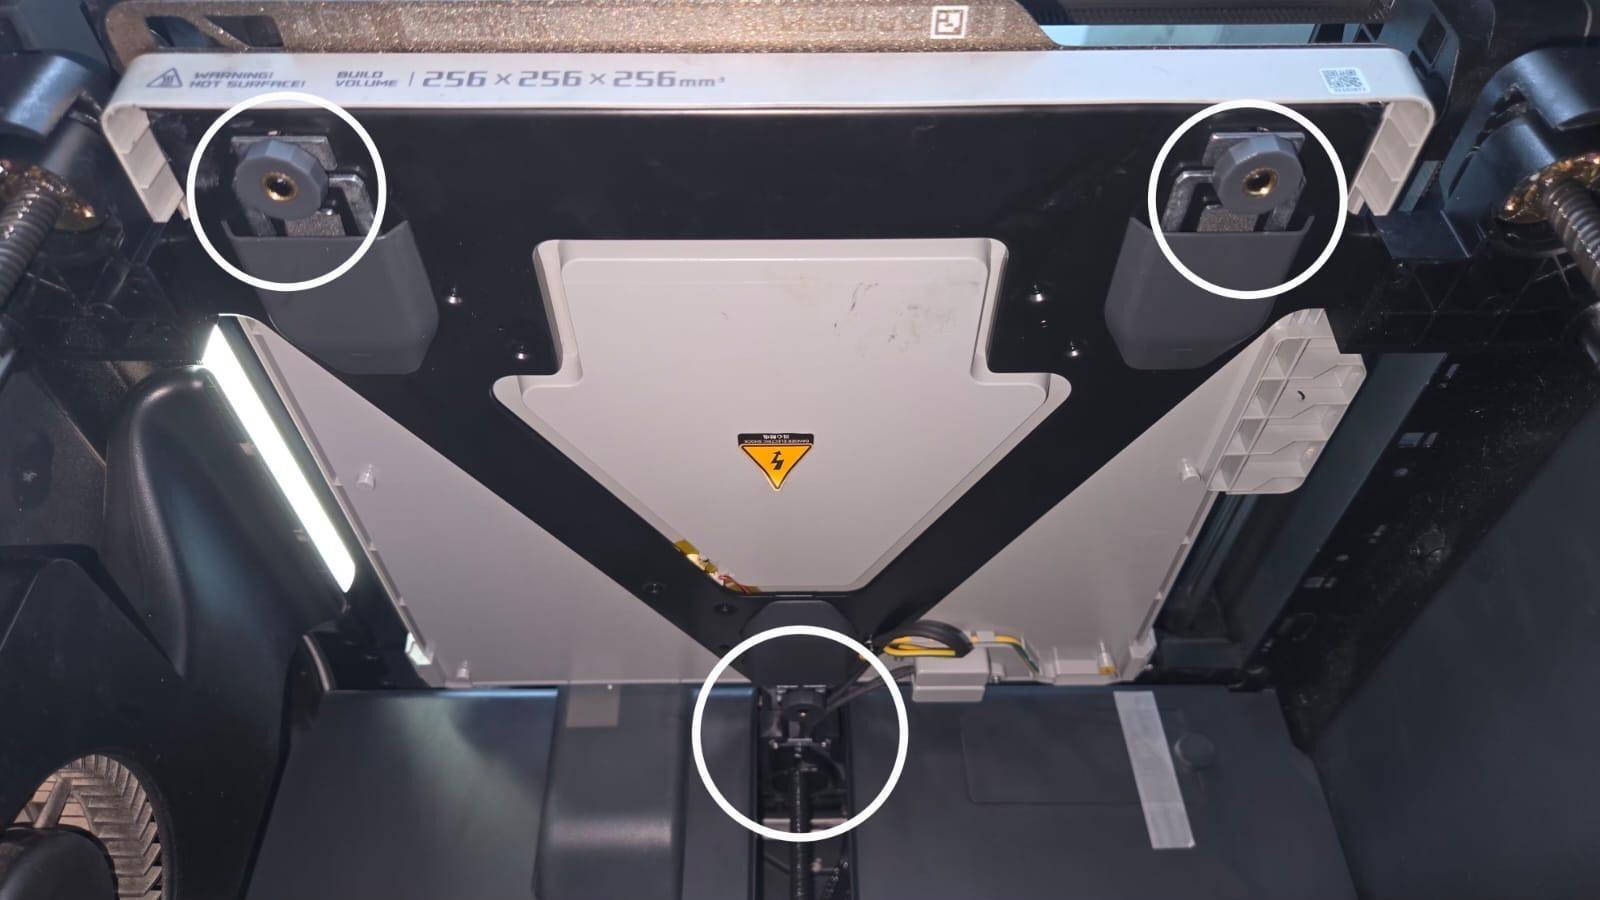
4. Adjust the Leveling Knobs
At each pause, turn the corresponding knob:
-
Clockwise lowers the bed.
-
Counterclockwise raises the bed.
Slide a piece of paper between the nozzle and the bed and adjust until you feel slight resistance. The nozzle should just barely touch the bed, not press into it, and not leave a gap.

5. Fine-Tune the Bed Level
The printer will repeat this sequence a couple more times automatically, with shorter 15-second pauses, so you can fine-tune each knob and double-check the gap.
6. Verify the Leveling Result
When the print finishes, confirm the result on the printer screen:
Settings > Calibration
Run the calibration process. No errors or warnings means the leveling was successful.
7. Print a Bed Level Test Object
As a final check, print a bed level test object. To create one directly in Bambu Studio, follow the steps below.
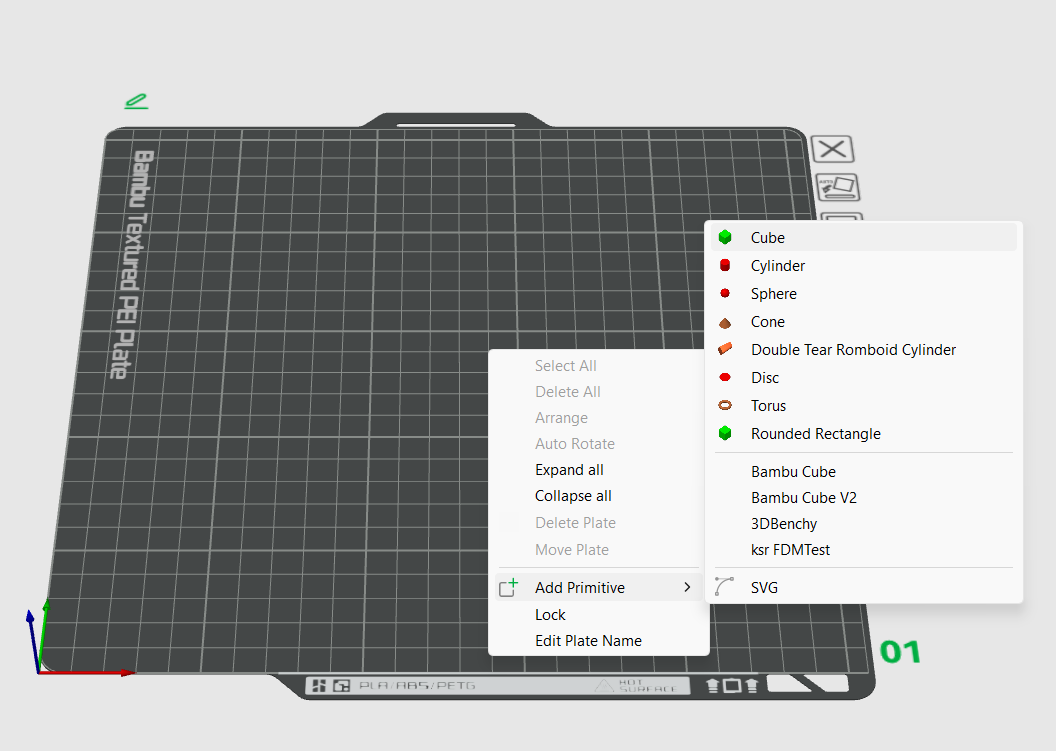
8. Add a Cube to the Build Plate
Right-click on the build plate and go to:
Add Primitive > Cube
to add a cube object to the plate.
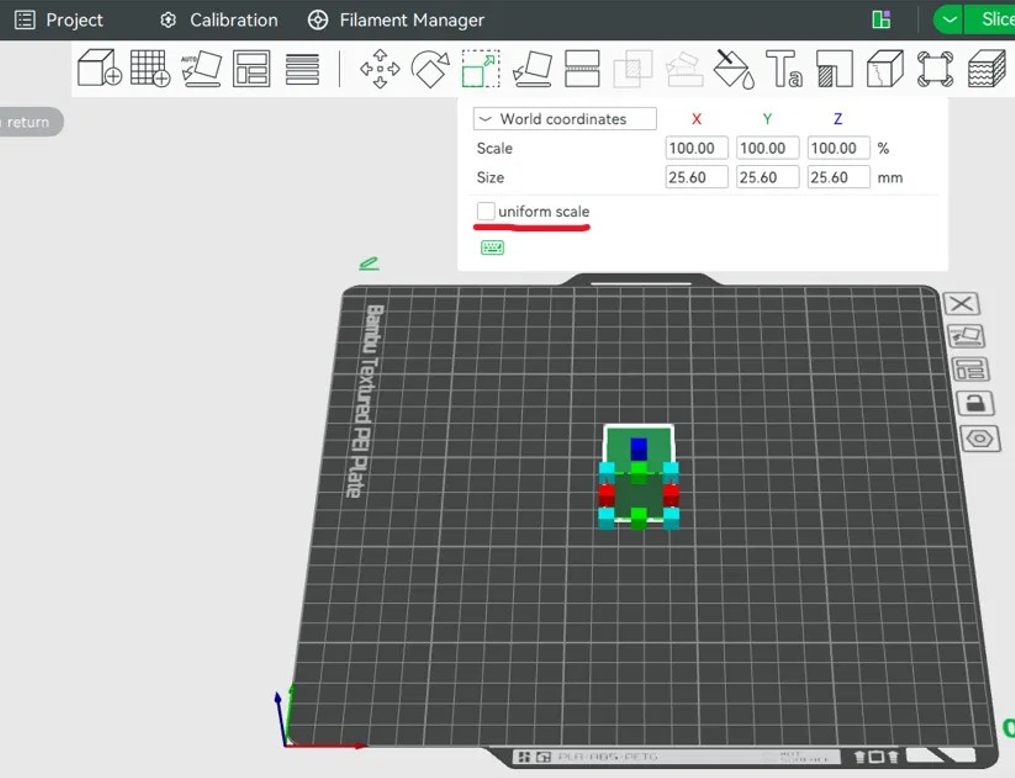
9. Scale the Cube
Select the cube, then click the Scale tool in the top toolbar (or press S on your keyboard).
In the scale panel that appears, uncheck "Uniform Scale" first. Then set:
-
X = Your bed size
-
Y = Your bed size
-
Z = 0.50 mm
This creates a thin sheet that covers the whole bed, perfect for checking first layer adhesion across the entire surface.
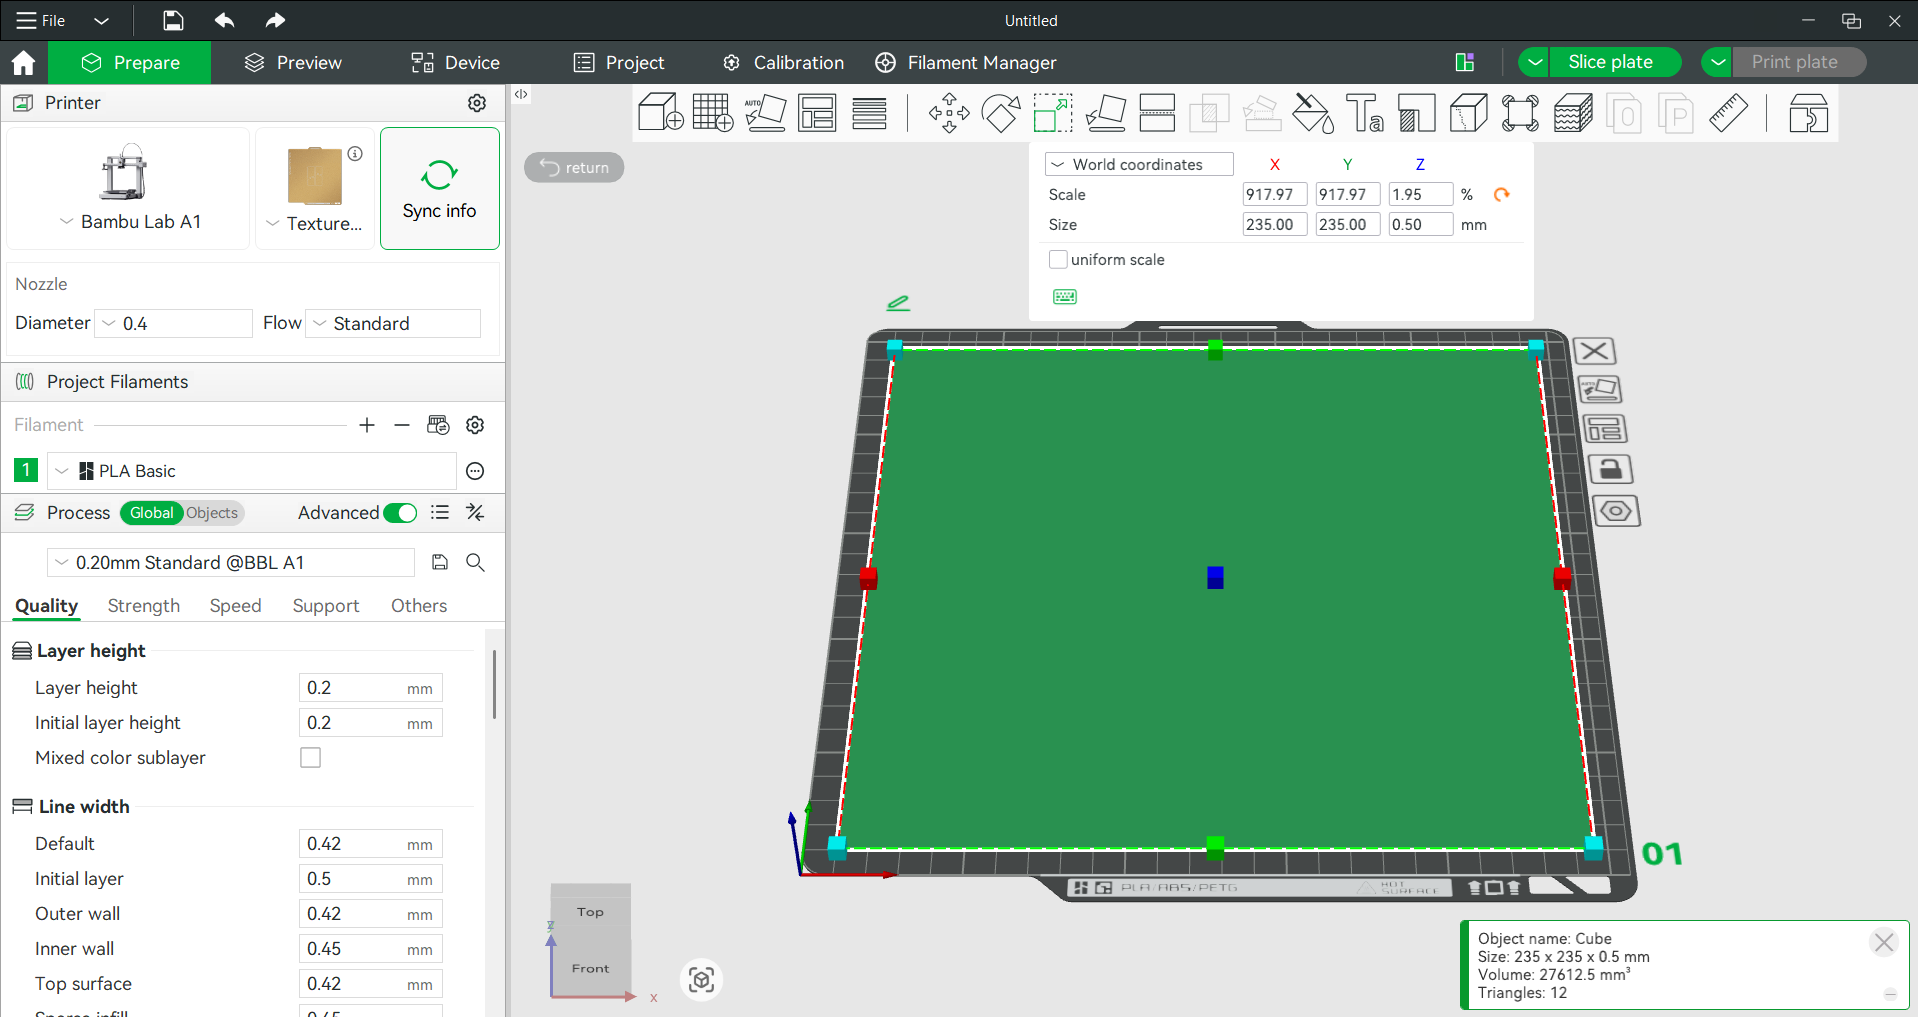
10. Create a Full-Bed Test Sheet
Your setup should now look like the image below — the cube scaled into a thin flat sheet covering the full bed.
Slice and print it, then confirm the first layer looks even across the whole surface.
Troubleshooting
Note: If the bed still isn’t level after completing all the steps above, repeat the whole procedure from the beginning rather than re-adjusting individual knobs.
If problems continue, don’t hesitate to come visit us at the SWBAC Workshop — our team in Kuwait is happy to help you troubleshoot in person.
Bring a photo or short video of the issue if you can!
References
Bambu Lab. (n.d.). Manual Bed Leveling / Manual Bed Tramming. Bambu Lab Wiki.
https://wiki.bambulab.com/en/x1/manual/manual-bed-leveling
Tags
Related Articles
Categories
3D Printing Kuwait
(1)
3D Printer Guides
(1)
Creality Ender 3 Upgrades & Modifications
(1)
3D Printer Upgrades & Calibration
(1)
3D Printing Guides & Tutorials
(1)
Programming 3D Printers
(1)
3D Printer Troubleshooting
(1)
Recent Posts
Programming 3D Printers
2026-06-243D Printer Guides
2026-06-243D Printing Guides & Tutorials
2026-06-23

Archives
Jun 2026
(7)
More From marketing
Programming 3D Printers
2026-06-243D Printer Guides
2026-06-243D Printing Guides & Tutorials
2026-06-23